Videoconference Modul
This manual is intended for all MITV platform users who want to learn video or audio conference management, chat management, conference participants management and conference recording.General guidelines
Device and software support
Please use Firefox or Chrome browser on PC.
Use latest Chrome on Android. 4-core device is required.
miBox application must be used on IOS. It is available at App store. Contact your administrator for more details on how to use it.
Video conferencing best practice
- Prepare and test equipment before conference.
- Keep your system on local mute unless you are speaking.
- Only one person should talk at a time.
- One person should be in charge and moderate videoconference. Layouts should not change unless necessary.
- Only use screen share when you need it.
- Mute your video when you have uplink bandwidth problem.
- Make audio only call if you have downlink bandwidth problem.
- Use PSTN network when you cannot access service in your browser.
Module description
This module is intended for communication and team working (groups). It makes it easy to create and manage groups of users and workspaces.
The main building block for such work are groups of users (groups).
Each group includes:
- Audio / Video conference room.
- List of activities (chat).
- The list of members, which can be internal users (groups or workspaces) or external (invited users who are not members of the group or workspace). For those users is always available connection status (online / offline).
- A list of shared content.
System login
First sign in (account creation)
On first entry in the platform, the user must create an account.
The user is required at the first entry in the platform to create their own account. When the Login button is pressed (located in the upper right corner of the user interface), login fields will appear. New account can be created in two ways.
The first way is through the Facebook, Google+ or Twitter platform.
For login via Google + user account, user should press the button Sign in with Google+. Google+ account entry will appears. The user must enter a username and password of Google+ account. At login, a new account will be created with identical data as it contains the Google account (email address and password). The same applies to Facebook and Twitter.
The second method allows the direct creation of the new account. User should click on the text Create account. The window for entering a username (username), email address (must contain @ character) and a password will appear. After user enter his information (username, email address and password), user should press the button Create an account and account will be created.
Sign in
For platform login user must press the button Login. The login fields are displayed. Login can be done in two ways.
The first way is through the Facebook, Google+ or Twitter platform.
For login via Google + user account, user should press the button Sign in with Google+. Google+ account entry will appears. The user must enter a username and password of Google+ account. The same applies to Facebook and Twitter.
The second method is standard login form.
The user should enter the registered E-mail address and the matching Password in the password field. Login is performed by pressing the button Sign in.
Sign in with invitation mail
Most common way of user sign-in is through enrollment email. This email is automatically sent by system when new user is added to workspace or group.
Invited user has to click link provided in email. Link opens browser link with password selection. User enters new password and from there on uses email and password combination for any new login if required. After that user is automatically logged in specific workspace or group.
New workspace creation
Only a system administrator can create new workspace. The workspace is intended for a single organization or part of an organization.
System administrator is workspace manager. Only the administrator has the right to invite users into workspace. When the user is a member of the workspace, user can select it on the user interface. Regarding to the chosen workspace he gets specific rights to content and other actions. Workspace manager can manage specific user rights.
Workspace has its own name, short description, logo and description. The first content that is displayed to workspace users is workspace asset.
Active workspace selection
When a user is a member of more than one workspace, he can choose between them. The selection is performed by clicking on the arrow located on the left of the logo. The list of all available workspaces appears.
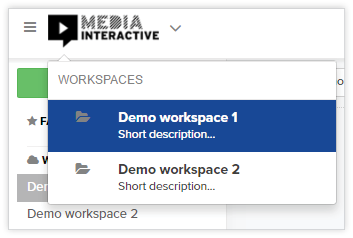
Image – the list of workspaces
When user click on the name of the workspace, library of assets appears. User that has corresponding right can also see directory of workspace members (see chapter Workspace members list). Depending on user rights, he can also manage the workspace members and assets.
Selection of the workspace is part of the so-called the context of the user. This provides the environment in which the user is currently working.
The workspace content management
Only workspace or system administrator can change workspace data. Administrator can edit workspace by selectin it and press on the button with pencil on the top right of the content or press the button three dots and choose option Edit asset (like editing any asset).

Image – the button with pencil for editing workspace
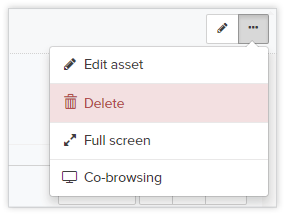
Image – option for editing asset / workspacen
After selection, interface for editing workspace appears.
The workspace user management
Workspace or system administrator can add or delete users from/in workspace. He can also managed user rights related to assets management.
Adding/inviting users in the workspace
Workspace administrator can invite other users into the workplace. He invites them in the following way. Log into the workspace in which he would like to invite new or existing users. Then he should press the button Add user, which is located under Users tab on the right side of the interface.
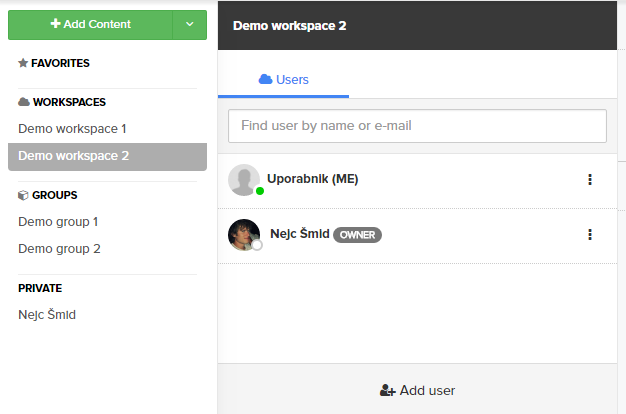
Image – the button for adding user in the workspace
Interface for adding users appears after clicking on the button Add user. In the e-mail field he should enter user’s e-mail addresses and press the button Add user (multiple users separator ";").

Image – interface for adding users in the workspace
The workspace members list
The user who has the right for presence (right Collaboration / Presence), will also see workspace members list or member’s directory. List is located on the right side of the interface - Users tab (in the case that the list is not visible, then press the arrow  on the right side of the interface). The green dot in the user picture tells that the user is currently present in the workspace. In the list next to each user is located the button three dots. Underneath are varieties of options, which represent powerful operations on users.
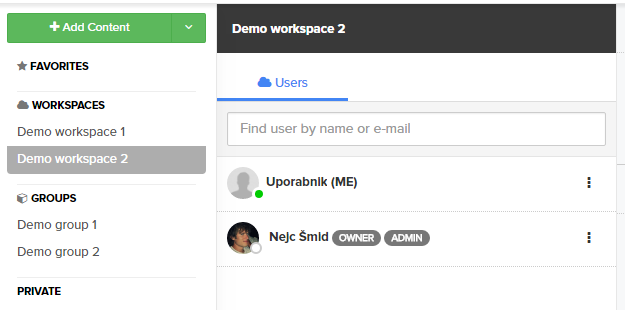
Image – workspace members list or member’s directory
Change user roles of the workspace members
Workspace or system administrator (the user who has the right Collaboration/WS admin or the owner of the workspace) can change workspace member’s rights. In the list next to each user is located the button three dots. Underneath is an option Edit user role.

Image – option for editing user rights/roles
When the options is pressed the interface for editing user rights will be displayed. It is possible to select the following rights:
-
Assets set of rights:
- Add – user can add assets in the workspace.
- Update – user can edit asset.
- Delete – user can delete assets.
-
Users set of rights:
- Add – user can add/invite new user/member in the workspace.
- Delete – user can delete other user/member from the workspace.
-
Collaboration set of rights:
- WS admin – user can change user’s rights.
- Add Group – user can create new group.
- Presence – user can see workspace members list or member’s directory, user can see present users on specific asset.
-
Other set of rights:
- Transcode – user can manually transcode video asset. Once video file is uploaded, automatic transcoding is performed.
- Statistics – user can see statistics for specific asset.
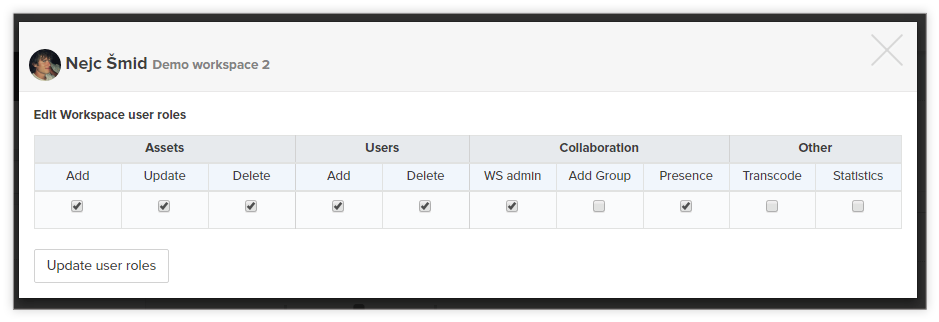
Image – interface for managing rights
To update the rights it is necessary to press the button Update user roles. System administrator can also manage user’s rights via admin interface.
Delete user from the workspace
Workspace or system administrator (the user who has the right Users/Delete) has also an option Remove from workspace. With this option, he can delete user from workspace. Option is located under the button three dots located in the workspace users list next to each user.
Image – an option to delete user from workspace
Asset management in the workspace
Add asset
User with the required role (Users/Add) can add asset in the workspace. Assets can be added in 3 ways:
-
By pressing the green button Add Content, which is located in sticky menu on the left side of the interface. The user can select one or more files that he would like to load into the library. Files are uploaded into the library, so that each gets its proper asset – platform automatically detect file’s type and set specific asset parameters (video, image, pdf ...). The user must be located in the desired workspace (breadcrumbs in the right corner in the image below).

Image – add content button
The same applies if the user click on the arrow next to button Add Content and choose an option Add File(s).
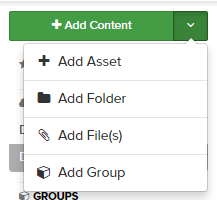
Image – add files button
-
Press the button Add Asset that appears when you press the arrow next to the button Add Content (see image above).
-
By pressing on the Add New Asset aria, which is located at the interface of the assets library.
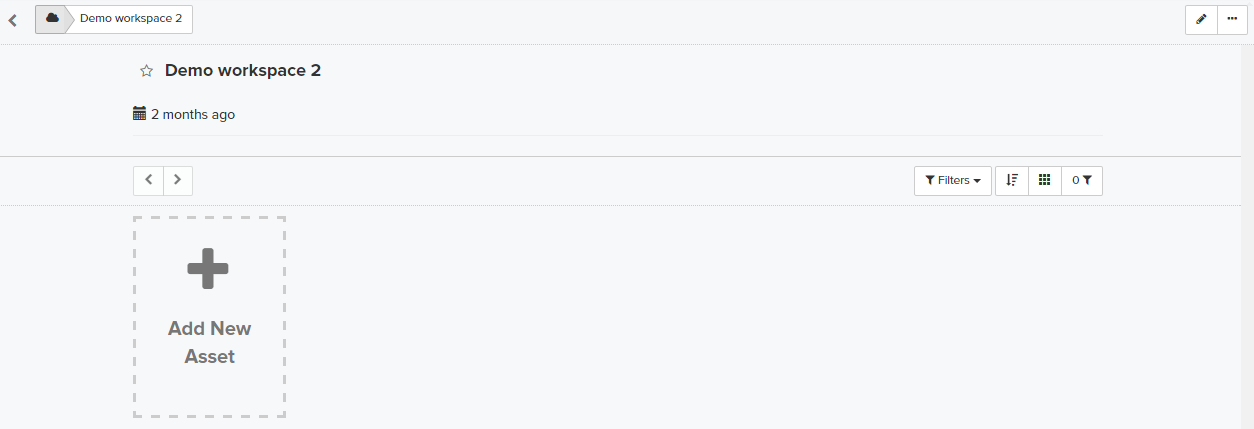
Image – add new asset aria
Edit asset
A user who has the right Update (right Assets/Update) can edit assets in the workplace. The asset editor can be accessed in two ways.
-
The user presses the button three dots, which is located at the bottom right corner of asset and choose option Edit asset.
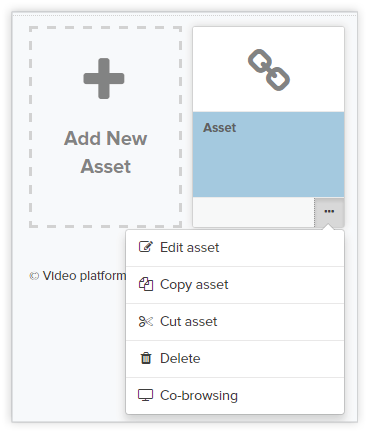
Image – the button for editing asset
-
The user presses the button with a pencil at the top right corner of asset or press the button three dots and choose option Edit asset.
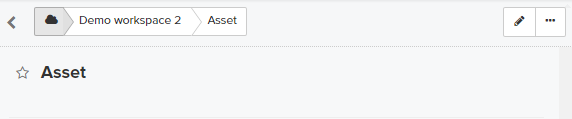
Image – the button with a pencil for edit asset
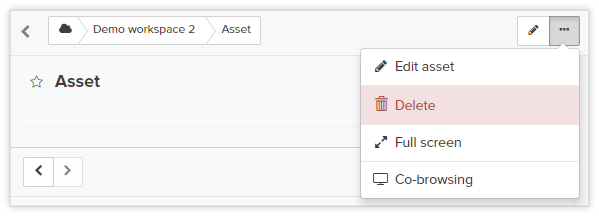
Image – the button for edit asset
When user presses one of the above buttons, the edit asset interface appears.
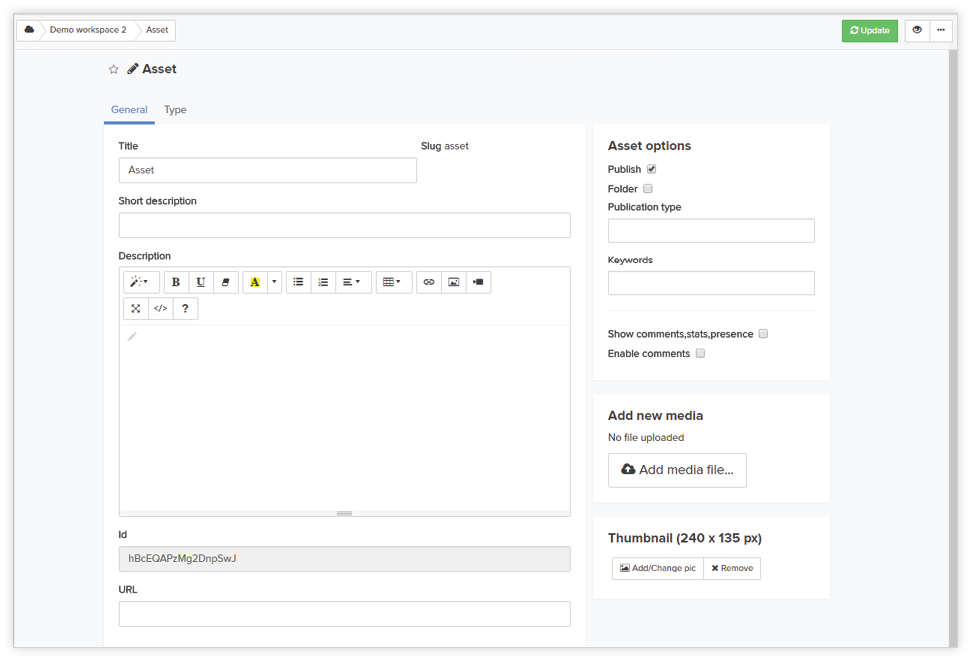
Image – the edit asset interface
User can set various fields on the asset. Such as the title, short description, the description with advanced HTML editor and more. If the user wants to make the asset visible to all members of the workspace must check the option Publish.
User can save edit filed by pressing the green button Update. If the user wonts to view asset should press the button with the eye  .
.

Image – the update button and button for view mode
Edit asset interface for system administrator contain more fields and options.
The group creation
Groups are designed for simple and quick communication between users. Users who have appropriate rights to create groups (right Collaboration/Add Group) can generate group.
The group contains members. These are the internal and external users. Internal users are those who are already members of the workspace. External users are those who are invited via email and are not members of the workspace.
Workspace user, who has the right Add Group, can create new group. In this case, user gets option Add Group located in the menu on the left side of the interface (the menu that opens when you click on the arrow located on the right side of the green button Add Content).
Image – add group option
At the click of the button Add Group, a new group creation interface appears. The group creator must enter a group name, a short description and he can also already invited users to the new group. This is done so that in the last field creator enter the email addresses of users (internal or external users). The users can also be invited later. All invited users will get the invitation e-mail. The group creator confirms the creation of new group by pressing the blue button Create Group.
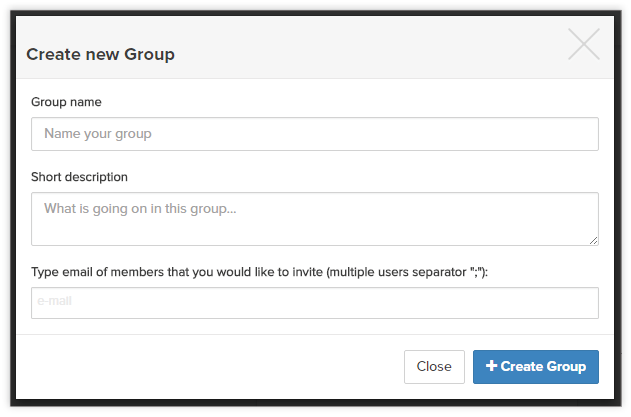
Image – new group creation interface
Active group selection
A user, who is a member of one or more groups, will on the left side of the interface in the sticky menu, see a list of groups (GROUPS). User can select specific group, by clicking on its name. This group becomes active group. User also gets ability to view group members list or member’s directory, group assets library and the possibility of textual communication in the group. If conference module is enabled, then user also has an option of conference calls.
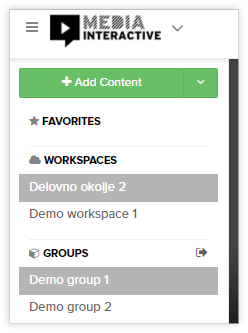
Image – list of groups
The group management
The group metadata can be changed in the same way as any other asset metadata. Select the desired group and press one of the buttons below.
Any member who has rights for editing (right Assets/Update) can change the group metadata. User should choose specific group and press on the button with pencil in the top right corner of the group asset or should press the button three dots and choose option Edit Asset (like editing any other asset).

Image – the button with pencil for group asset edit
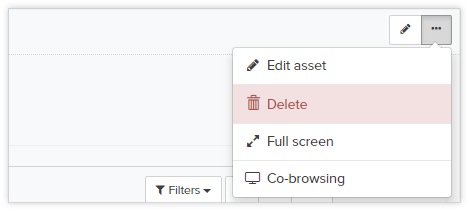
Image – the button for group asset edit
After button press group, edit interface appears.
The group user management
Adding user in the group
Users can be added ore removed from the. Users can be added in three ways:
-
When the group is created, user can add new user/users in it (see chapter The group creation).
-
If the user has the right to add a user to a group (right Users/Add) may, under tab Members in the sticky menu on the left side of the interface, click on the button Add member (in the lower right corner).
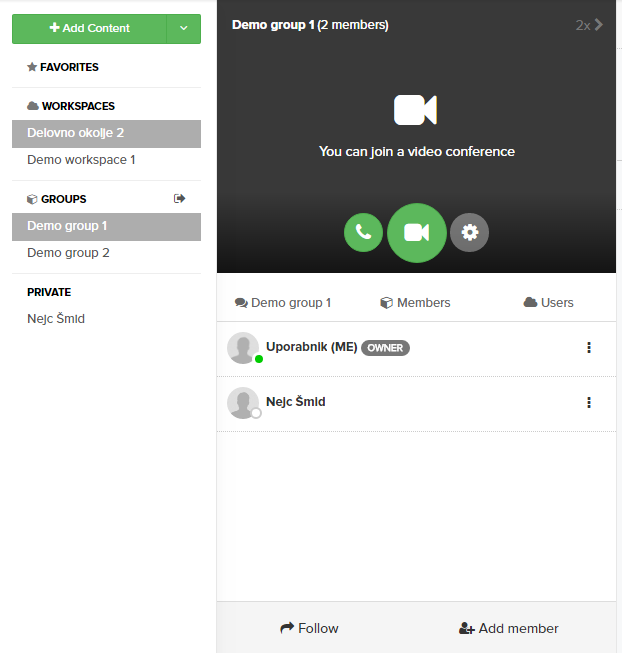
Image – the button for adding members in the group
Interface for adding users appears after clicking on the button Add member. The first filed Personal message represents a message, which will be part of invitation e-mail that will be sent to the invited users. The second field is a Direct Group URL. This is the URL for direct access to the group. And the third field is intended for of one or more invited users.
To confirm the invitation it is necessary to press the blue button Add member. Added users receive an invitation to the specified e-mail addresses. Users who have not logged on to the platform, must first set password and thereby create their account.
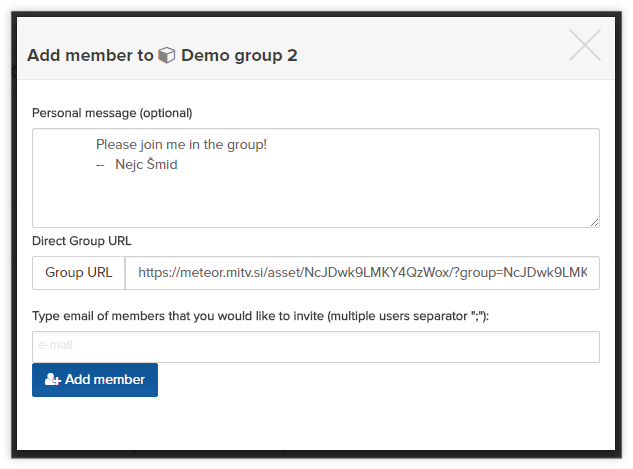
Image – the button for adding members in the group
-
If the user is located within a particular workplace and at the same time has selected group, he gets under Users tab / the button three dots, option Add to "group name". The user, which has the right to add user in particular group, can add workspace user in the group.
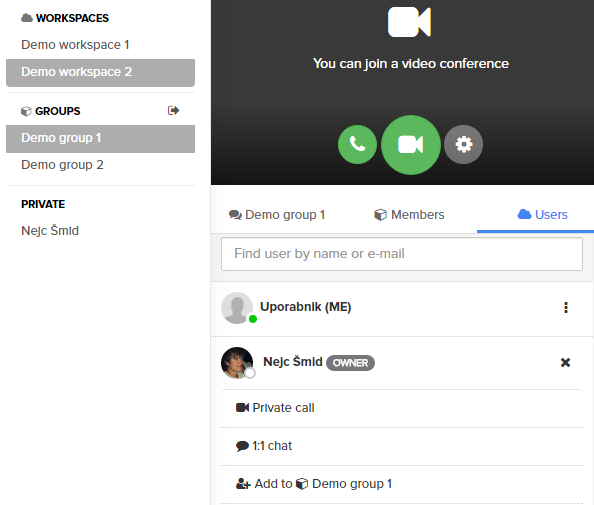
Image – the option to add workspace member in specific group
The group members list
Each member of the group can see group members list or member’s directory. List is located on the right side of the interface - Members tab (in the case that the list is not visible, then press the arrow on the right side of the interface). The green dot in the user picture tells that the user is currently present in the group. In the list next to each user is located the button three dots. Underneath are varieties of options, which represent powerful operations on users.
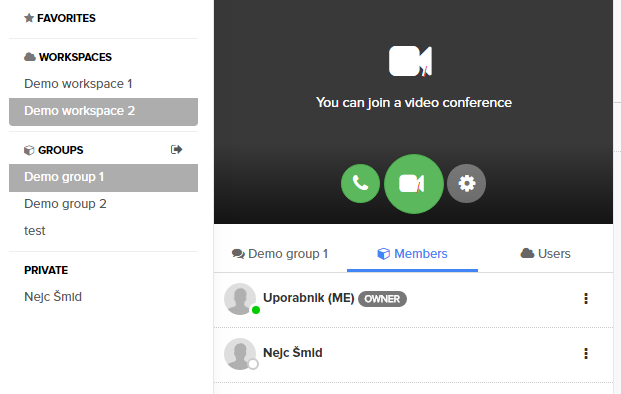
Image – group members list or member’s directory
Change the rights of the group members
Group user (the user who has the right Collaboration/GR admin) can change group member’s rights. In the list next to each user is located the button three dots. Underneath is an option Edit user role.
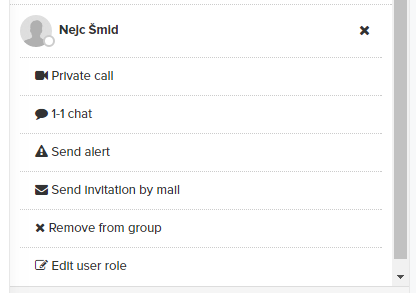
Image – options for editing user rights/roles
When the options is pressed interface for editing user rights will be displayed. It is possible to select the following rights:
-
Assets set of rights:
- Add – user can add asset in the workspace.
- Update – user can edit asset.
- Delete – user can delete asset.
- Users set of rights:
- Add – user can add new user/member in the workspace.
- Delete – user can delete other user/member from the workspace.
- Collaboration set of rights:
- GR admin – user can change user’s rights.
- Presence – user can see workspace members list or member’s directory, user can see present users on specific asset.
- WebRTC – user can manage the conference.
- Other set of rights:
- Transcode – user can manually transcode video asset. Once video file is uploaded, automatic transcoding is performed.
- Statistic – user can see statistic for specific asset.
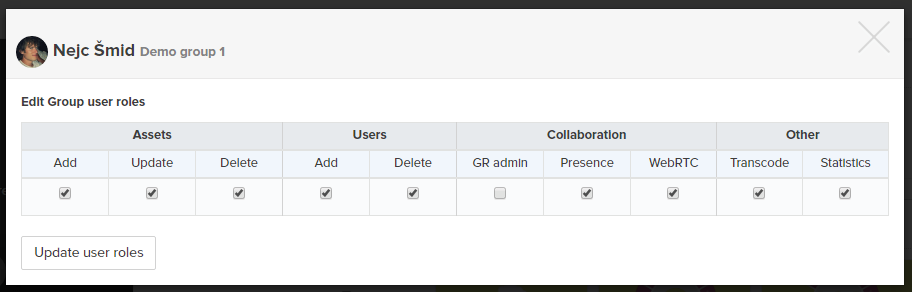
Image – interface for managing rights
To update the rights it is necessary to press the button Update user roles. System administrator can also manage user’s rights via admin interface.
Group member has set by default all right.
Delete user from the group
Group user (the user who has the right Users/Delete) has also an option Remove from group. With this option, he can delete user from the group. Option is located under the button three dots located in the group members list next to each user.
Image – an option to delete user from the group
Asset management in the group
Asset management in the group is the same as in the workspace (see chapter Asset management in the workspace).
Video conference creation
The Conference room is generated in the group when enters in the conference at least one member of the group. When the last member leaves the conference room, the conference room is automatically deleted. This is important because the number of conference rooms is license limited. The system administrator can also manually deletes the conference room.
Enter and exit videoconference
Group member can enter and exit from the conference. Entry can be trough audio mode only  or in audio/video mode
  .
.
Member may exit from the conference by pressing the red button  .
.
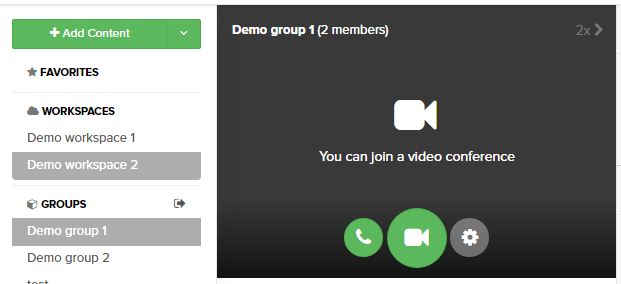
Image – conference module interface
Video conference management
The following options for the conference management are supported:
-
Any member can locally turn off his video or mutes his microphone. This is done by pressing on the buttons
 and
and  . The first button stops sending user’s own video, while others stop sending their own audio. This operation is performed on the local system. Buttons changes their status/icon
  .
.Member can also see status in the upper left corner of the conference window - banner
 . Each conference member has the right to use these two options.
 -
The changing of video conference layout – button
 . The button is only visible to the user who has the appropriate right (right Collaboration/WebRTC). There are several options.
Auto means automatic adjustment to the number of members. 1 means that everyone is watching only one member, 2 means that everyone is watching two members, 1/5 means one large member and five small members and 9 means 9 members at the same are visible in conference.
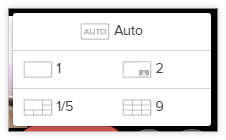
Image – conference layout interface
-
Replace front speaker in the conference. Simply the speakers rotate are performed with the button
 . Button is only visible to the user who has the appropriate right (right Collaboration/WebRTC). This mode is suitable for a small number of conference members and in full screen mode.
The second way of selecting front speaker is a direct way. In the group members list, the user can select in call member and press the button
 . When the button is pressed, the member is moved to the forefront.
Members of the conference, while share screen enabled, can also see the button
 . When the button is pressed, the selected share screen is moved to the forefront.
Image – the button for placing a speaker/share screen to the forefront
-
Mute/unmute a member of the conference. The user can press the button
 to turn off or turn on the voice of a specific conference member. This operation is performed on the conference server. Button is only visible to the user who has the appropriate right (right Collaboration/WebRTC). Button to mute a conference member is located beneath the button with three dots – option Mute.
User should also see in the upper left corner condition
 .
. -
Calling a member on the PSTN phone. This option is available only if you use the SIP trunk function. The user can click on the button with three dots, located at the desired user, and select option Call sip. This option is visible only to the user who has the appropriate right (right Collaboration/WebRTC).
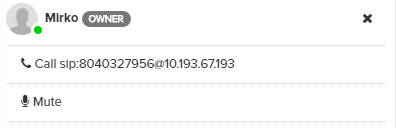
Image – Sip call option
-
Conference recording. The user, who has the appropriate right (right Collaboration/WebRTC), can see The record button
 in the control bar. More in chapter Conference recording.
 -
Share screen/window in the conference. Each member of the conference can see in the control bar, the button for share screen/window
 . More in chapter Share conference screen/window.
 -
Conference in fullscreen mode. When the user is in the conference, he can see in the top right corner of the display button for full screen screen
 . User can exit from fullscreen mode by pressing the X button in the upper right corner.
Share conference screen/window
Sharing window or the entire screen is supported on desktop browsers Firefox and Chrome. Before you can use this function, it is necessary to load browser. Instructions for installing extensions and connections to the extension are available at <platform IP address>/docs/webrtc.html.
When an extension is installed, user can start sharing screen by pressing the button .
When using Chrome, selection window is displayed (image below).
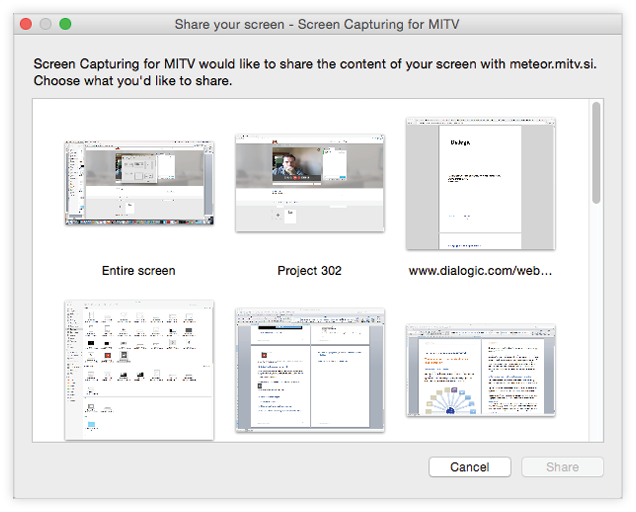
Image – screen share selection window in Chrome
And when using Firefox, another type of selection window is displayed (image below).

Image – screen share selection window in Firefox
Co-browsing option:
Each asset can be presented in co-browsing window. This option is located beneath the button with three dots located in the upper right corner of the asset.
When this option is selected, the asset opens in a new window with specific resolution to fit the conference window. This option is used screen sharing or displaying asset content.
Sharing screen can be stooped by pressing the button  .
.
Content sharing in the group
The group member may share or add any content in the group (if he have the appropriate right - the right Assets/Add). He can add new content when he has selected specific group in the same manner as in the case of adding content into the workspace (see chapter Asset management in the workspace). Have access to it, only members of the group have access to group assets.
Conference recording
The conference will be started recording by pressing the button . All conference members will be informed by beep and in the conference window, he can see flashing status  . Record button is visible only to the user who has the appropriate right (right Collaboration/WebRTC).
Recording can be stooped by pressing the button  .
.
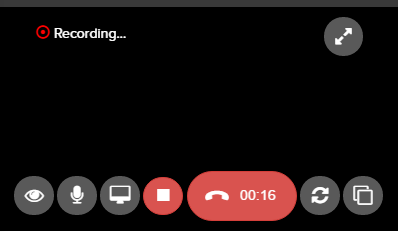
Image – conference recording
The recordings will be automatically saved under group asset. Depending on the record length, the record operation may take up to several minutes (recordings that take hours).
Sharing currently selected asset in the group
User can share currently selected asset with other members of the group. User can start sharing by clicking on the button  located in the lower left corner of the group members list. User which sharing selected asset will managed other users current asset. Users must follow sharing by pressing button
  . Following is stopped by pressing the same button
  .
.
User can stop sharing selected asset by pressing the button  .
.
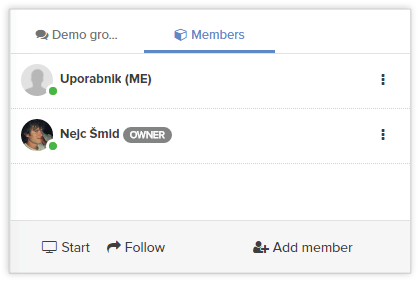
Image – button for sharing selected asset and button for following this sharing
Chat (group activity list)
Chat is designed for communication between group members. What one member write, all members can see. Group member can see chat tab for text messages as it is visible on below image. Chat is located on group menu under tab with group name and icon  . User can write message in the field at the bottom and press the button
  .
.
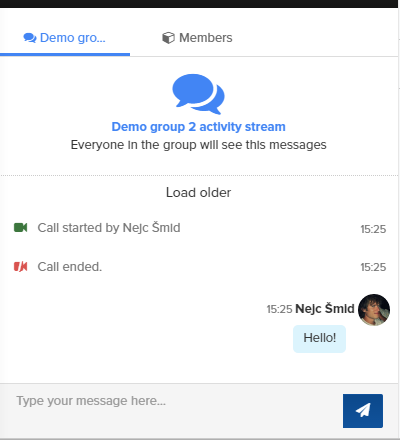
Image – chat/group activity list
Besides member’s messages, list also contains group activity events. Example: Start and stop conference, start and stop conference recording, file upload...
If a member has not chosen chat tab, beside chat icon is displayed the number of new chat messages.
Users can delete their own messages by pressing the X button next to the message.
If there are more activity events then can be displayed on the screen, user can load older by pressing Load older button, which is located at the top of the activity list.
Chat (1-1 conversation)
Users can chat with multiple users at the same time, but there is also option of direct chat. Direct chat can be created by selecting option 1-1 chat, which is located beneath the button with three dots, besides member name with which user want to communicate (workspace or group members list).
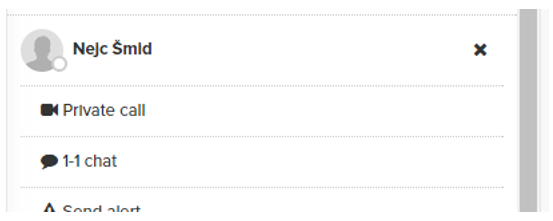
Image – option 1-1 chat
In the sticky menu on the left side of the interface, below PRIVATE, the list of the private communication channels will appear.
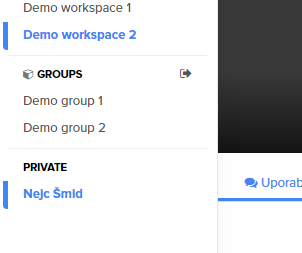
Image – the list of the private communication channels
Alerts
If user wants to alert the member of the group to come in the group, user may send invitation alert. Alert can be sent by selection option Send alert, which is located beneath the button with three dots, besides member name with which user want to communicate (group members list).
Image – option Send alert
Following invitation alert will be sent to the specific user. It appears in the lower right corner of the platform.
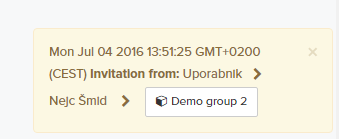
Image – invitation alert
If the user will click on button with group name, he will be moved to specific group. If the user wonts to delete alert, he should click on X button.
Sending invitation e-mail
When group member wants to invite external user in the group, he can invite him true invitation e-mal. He should select option Send invitation by mail, which is located beneath the button with three dots, besides member name with which user want to communicate (group members list).
Image – send invitation by mail
Invitation mail will be sent to invited user. Mail will contain a link to the group from which the invitation was sent.
Private call
Two users can create among themselves a private call. The private call is made by clicking on the option Private call, which is located beneath the button with three dots, besides member name with which user want to communicate (workspace or group members list).
Image – option private call
In the sticky menu on the left side of the interface, below PRIVATE, the list of the private communication channels will appear. Similar to creating a 1-1 conversation.
The same workflow should be performed when creating private call in the workspace.
Call the user to an external telephone number (SIP)
If the server is appropriately connected to an external SIP proxy and is leased by a subscriber SIP trunk, group members, that have entered phone number, can call them from the conference in the classic telephone network (PSTN).
User can deal specific user by clicking on the option Call sip, which is located beneath the button with three dots, besides member name with which user want to communicate (group members list). This option is visible only to the user who has the appropriate right (right Collaboration/WebRTC).
Image – Sip call option
Advanced review of currently active conference rooms and calls
System administrators can review active conference rooms and video and audio conference calls by clicking on the option Conferences in admin menu.
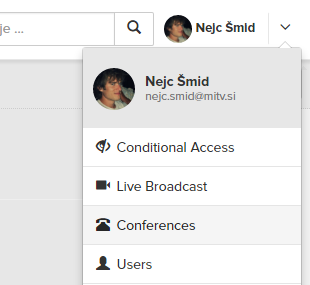
Image – advanced review of conferences
The list of currently active conference rooms and calls will appear. Example below. Active are 2 conference room. In one of them is an active one incoming call created by Admin MiTV.
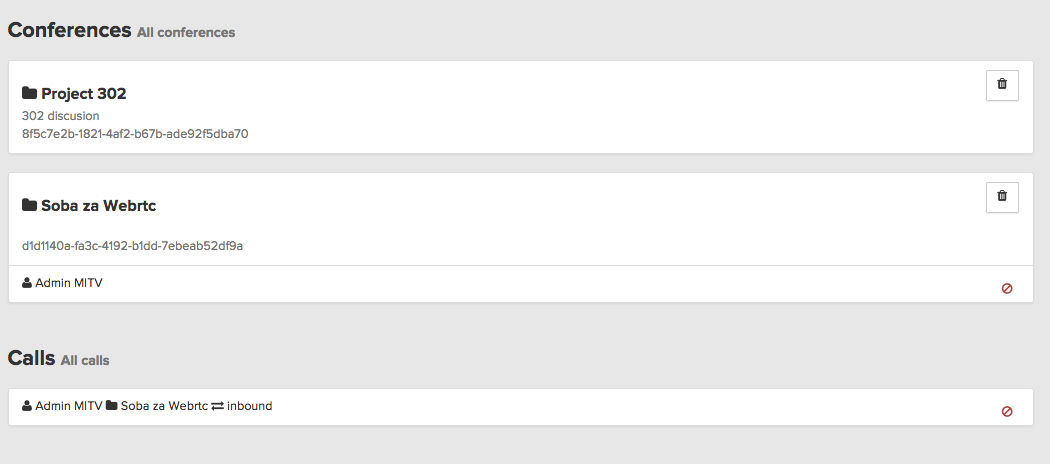
Image – advanced review of currently active conference rooms and calls
Administrator can press the trash button  to delete specific conference room or press delete button
  to delite specific conference call.